Camera filters for Razer Webcam: A Complete Guide
Looking to get the most out of your Razer Webcam? You've come to the right place! Enhancing your video quality can significantly improve your online presence, whether for work, streaming, or personal use.
In this comprehensive guide, we'll show you how to elevate your Razer Webcam video quality with professional-grade camera filters. From subtle enhancements to creative transformations, you'll discover how to look and feel your best in every video interaction. Let's dive in!
Introducing Filteronme: Your Razer Webcam Enhancement Solution
The above video demonstrates Filteronme in action. Use the slider to see the before and after effects of the filters. Filteronme is the perfect companion for your Razer Webcam.
Razer webcams, such as the Kiyo and Kiyo Pro, are built for gamers and streamers, offering features like built-in ring lights and HDR capabilities. When combined with Filteronme's professional filters, you can complement your Razer webcam's high-quality video, creating an even more polished and engaging on-camera presence for your audience.Filteronme is the go-to application for adding professional-grade filters to Razer Webcam and other video devices. Available for both Mac and Windows, Filteronme offers a wide range of features to enhance your video presence:
- Face Sculpting: Subtly refine your facial features with options for face thinning, jaw shaping, and more.
- Skin Perfecting: Achieve a flawless complexion with skin smoothing and foundation effects.
- Eye Enhancements: Make your eyes pop with color changes, enlargement, and brightening filters.
- Lip and Teeth Improvements: Add a touch of color to your lips or whiten your teeth for a dazzling smile.
- Makeup Application: Experiment with virtual lipstick, blush, eyeliner, and other makeup effects.
- And much more: Explore our full range of filters and effects.
The best part? You can try Filteronme for free, no credit card required!
How to Set Up Filteronme with Your Razer Webcam
Getting started with Filteronme on your Razer Webcam is quick and easy. Follow these simple steps:
-
Download Filteronme: Visit our downloads page and get the latest version for your operating system.
-
Install the Application:
- For Mac users: Follow our Mac installation guide.
- For Windows users: Check out our Windows installation guide.
-
Launch Filteronme: Open the application and allow any necessary permissions for camera access.
-
Configure Your Video Software:
- Open your preferred video application and go to the video settings.
- In the Camera input section, select "Filteronme Camera" as your video source.
-
Start Enhancing: With Filteronme running in the background, you're ready to look your best with your Razer Webcam!
How to Use Filteronme with Your Razer Webcam
Once you've selected Filteronme as your camera input, you can start applying filters. Remember to keep the Filteronme app open while you're using your Razer Webcam.
To apply a filter, go to Filteronme and find a filter you like. Then drag the slider to the right to increase the intensity of the filter. You can drag to the left if you want to decrease the intensity.
For example, here's a video showing how to increase the intensity of the teeth whitening, skin smoothing and face thinning filter. You can also see the before and after of the filter by using the toggle switch in the bottom left corner.
Some filters also have a color adjustment option. You can click the color panel and a color selection window will appear. Here you can select a color for the filter from the preset colors or choose a custom color.
For example, here's a video showing how to apply a custom eye & lip color:
Feel free to experiment with different filters and settings to find the perfect look for your video calls and streams. There are an infinite number of combinations you can try.
To see a before and after, you can turn off the filters by toggling the "Enable Filters" switch in the bottom left corner.
Mastering Filteronme: Tips and Tricks for Razer Webcam Users
Now that you're set up, let's explore how to make the most of Filteronme with your Razer Webcam:
1. Find Your Perfect Look
Experiment with different filters to find the combination that suits you best. Start subtle and gradually increase intensity until you're happy with the result. Remember, the goal is to enhance your natural appearance, not create an entirely new look (unless that's what you're going for!).
2. Create Custom Presets
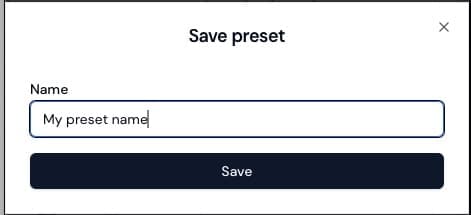
Once you've found your ideal filter combination, save it as a custom preset. This allows you to quickly apply your favorite look for future video sessions. To create a preset:
- Adjust filters to your liking
- Click the "Save Preset" button
- Name your preset (e.g., "Professional Meeting" or "Streaming Setup")
- Click "Save"

You can save multiple presets and switch between them easily in the presets tab.
3. Optimize for Your Audience
Consider your audience when choosing filters:
- Professional Meetings: Opt for subtle enhancements that look natural and professional.
- Social Calls: Feel free to experiment with more fun and creative filters.
- Streaming: Use bold effects that will stand out on smaller screens.
4. Combine with Your Razer Webcam's Features
Don't forget to use your Razer Webcam's native features alongside Filteronme. For example, you can still adjust your camera's settings while benefiting from Filteronme's face-enhancing filters.
5. Try Community Presets
We have a community of users who have shared their favorite Filteronme presets. You can find these on the community presets section of the presets tab.
Why You Need Camera Filters for Your Razer Webcam
Now that we've explored the amazing world of Razer Webcam filters, let's address why they're so important:
- Enhanced Video Quality: While your Razer Webcam provides great video quality, filters can take it to the next level.
- Consistent Appearance: Filters help maintain a consistent look across different lighting conditions and environments.
- Boost Confidence: When you look good, you feel good. Filters can help you feel more confident and comfortable on camera.
- Professional Edge: In business settings, a polished appearance can give you a competitive advantage.
- Creative Expression: Filters offer a fun way to express yourself and entertain your audience, especially for content creators and streamers.
Frequently Asked Questions
Is Filteronme free to try with my Razer Webcam?
Yes! You can try Filteronme for free without a credit card. We offer a paid subscription for unlimited use, but the free version is a great way to see if Filteronme is right for you.
Will people know I'm using filters with my Razer Webcam?
When applied subtly, Filteronme's effects are virtually undetectable. The goal is to enhance your natural appearance, not create an obvious filter effect.
How often is Filteronme updated?
We release updates regularly, adding new features and improving performance. You'll be notified within the app when updates are available.
Can I use Filteronme on multiple devices?
Yes, your Filteronme license allows you to use the software on multiple devices. However, you can only have one active user at a time.
How do I change the input video device for Filteronme?
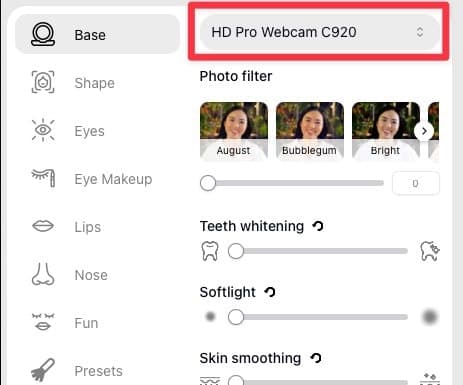
To change the input video device for Filteronme, go to Filteronme settings and select the "Camera" tab. From there you can select your Razer Webcam as the input device.

Ready to Transform Your Razer Webcam Experience?
Now that you're equipped with everything you need to know about using camera filters with your Razer Webcam, it's time to take action! Download Filteronme today and start impressing your audience with your enhanced video presence.
Get Started with Filteronme for Free
Remember, looking good on camera isn't just about vanity - it's about feeling confident, making great impressions, and communicating effectively in our digital world. With Filteronme, you'll always put your best face forward with your Razer Webcam!
On this page
- Introducing Filteronme: Your Razer Webcam Enhancement Solution
- How to Set Up Filteronme with Your Razer Webcam
- How to Use Filteronme with Your Razer Webcam
- Mastering Filteronme: Tips and Tricks for Razer Webcam Users
- Why You Need Camera Filters for Your Razer Webcam
- Frequently Asked Questions
- Ready to Transform Your Razer Webcam Experience?
Filters for
video calls & streams